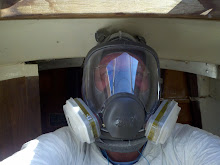
FRIDAY MORNING 7/13: I am making the following list of stuff that I need to do over the upcoming three days of rain. Lets see if I can do it!
MONDAY MORNING 7/16: Comments in green!
° Old generator - clean carbs/tank, tune up and sell.
FAIL! I decided to forego cleaning the carbs and spending any money on this thing. I took some pics, placed an ad in Craigslist and waited....and waited....and waited. Two guys emailed me, even though my phone number was in the ad, and offered trades. I am trying to get rid of stuff, not exchange stuff.
° Clean old caulk off of Goiot 30 hatch frame.
WIN! This was much easier than the window frames. Before:
After:
° Remove Goiot 30 teak hatch base from cabin top.
FAIL! I did not step in the boat once over the whole weekend.
° Sort my shorts. Yes, really!
WIN! This amounted to reorganizing the spare bedroom (the sail loft) and the closet in that room. This room has two six foot long folding tables sitting side by side in the middle of the room. The walls are lined with stacks of old stuff I have taken out of the boat along one wall and new and as yet not installed stuff along another wall and under the tables. It is now uncluttered again and I will be able to put even more stuff in there YAY!
° Sew buttons back on shorts that need it. Move others!
FAIL! I just simply was not feeling the sewing bug. Besides, beer and needles could be dangerous!
° Move charts upstairs and sort/catalog.
WIN kinda! I bought a nearly complete set of British Admiralty charts of the world that came off of a recently wrecked freighter. The set does not include very many small scale (ports) charts but the important ones are there. The set is made up of mostly large scale charts that cover the globe, 100 pounds worth. Here is a pic of the boxes they arrived in:
And here I have moved them to the sail loft upstairs and sorted in numerical order. I want to go through them and catalog them so I can see what I have and what I need to complete the set.
° Fix ID lanyard.
WIN! Low hanging fruit, fixed with gorilla glue.
° Remove old epoxy from paint pots, clean up stirrers and spreaders.
WIN! Cleaned up while I had my morning coffee in the boat yard (back porch) while it rained.
° Re-install shaft log and permanently mark alignment inside boat.
FAIL! Didnt get in the boat.
° Remove winches from winch pedestals. Inspect winches.
WIN! But it was not easy! On the port side, larger Barient 22 winch, two bolts did not cooperate. I had to force their submission by drilling the heads off and punching them through. No damage was done to the winch or the pedastal because I was careful although frustrated. Check it out:
BANG!
And BANG again!
Check this out, one of the older winches was being held on by one bolt. The rest had backed off. None of them had lock washers.
° Poke around/inspect the rudder shoe and gudgeons.
Eh, I took some pics, so WIN!
° Plan companionway hatch and sea hood. Make a material list, place order.
FAIL! I am doing it today though! I am going to make these out of G10 laminate and possibly Coosa board.
° Measure deadlight lens and forward hatch lens. Make a material list, place order.
WIN! Ordered five 12"x24"x3/16" smoke tinted lexan sheets.
° Measure for and order Bomar inspection hatch for cockpit floor.
WIN! I ordered the nice aluminum version.
I had a great weekend even if it did rain off and on the whole time.
Fair winds...._/)
Check it
- Jimmy - The Skipper
- Florida flat-lander refitting an Alberg 30, hull #329, for an eventual circumnavigation of the globe and the journey of a lifetime before I get too old!
Monday, July 16, 2012
Tuesday, July 10, 2012
Recore and a blessing!
Last week I had some spare time and I intended to use it by beginning my re-coring project. There were some spots that I knew needed re-cored and others I was not sure about. Every hole was suspect and there were a lot of holes.
I started on the hole where the old sewage system suction vent passed through the port decks. I knew this area was bad. I started by drilling holes through the top skin and inspecting the core beneath. By doing this I could determine extent of rot and mark it for removal.
I made the cuts using a 4-1/2" Kobalt diamond blade on a grinder. The outer cut is 3-1/2" from the toe rail which leaves a 1/2" lip over the core. The outer or left edge of the hole pictured above is the hull to deck joint.
I wanted to keep the patches square or rectangular in order to keep it simple. I had to sacrifice good solid core to do this though. Some rot and some good solid core:
Not as bad as I thought it would be. I scraped out the old core, cleaned it up and sanded the bottom skin down to a good surface. I also used a dremel to remove the core around the edges about a 1/4".
And then grinded away the surrounding gelcoat and beveled the bonding area.
Cut the new core and cloth...
And made the repair!
My very first re-core! I was threatened by rain the whole time. Once the old core was exposed, the clouds showed up and it was raining all around but not right where I was thank goodness. I was worried about it though, trust me. Eh, I forgot to mention that before making this patch, I filled the edges where I removed old core with thickened epoxy.
From there I moved to the port side genoa track. This is a series of six holes through which the track mounts. It was highly suspect in my mind. I didnt want to muck up the entire area though so I started by inspecting the core at each hole. I used a 1-1/4" carbide grit hole saw and sawed out each hole.
Much to my surprise there was not rot! I sounded out board of these holes and it seemed solid.
So, I cleaned up the holes and removed a 1/4" of surrounding core using these dremel bits:
These things made the job easy...kinda. I could not imagine having to use a bent nail in a drill for this. Here they are ready to fill:
I decided at this point to visit every hole on the fore and side decks in this manner. What a blessing I was faced with when I was done! No rot at any of them! 38 holes and all were bright yellow core as if it were installed yesterday!
I now had 38 1" and 1-1/4" holes to clean up, remove surrounding core, acetone wipe and fill with epoxy. The inner perfectionist in me would not allow a shoddy job so this took some time.
Here is an example of a hole ready for epoxy. It is hard to see but the core is recessed 1/8" all around
Through some experimentation I determined that I needed a pour-able epoxy mixture. The mixture I chose was a one using milled glass rather than cabosil. For each two "pumps" of West Systems epoxy I added one heaping tablespoon full of System 3 milled glass. This made a very strong plug that would not break and could be poured.
Now how to pour it!?!? I have not had very good luck with big syringes so I came up with a good solution that made this easy too. I took a 16oz plastic dixie cup and made a small hole right at it's bottom but on it's side. I could then pour a few ounces of the milled glass epoxy in the cup, return my pot of epoxy to the bucket of cool water and work with the cup. By tipping the cup towards the hole I could control the rate of flow and fill my patch with no mess. Genius!
I filled all 38 holes this way without spilling any which was amazing. I am used to epoxy everywhere! After the filled holes tacked up a bit I had to go back and finish filling them with thickened epoxy because they were all on a slope like this:
You can see the high side (left) where the thickened epoxy is much more opaque.
The fore deck done!
Starboard coach roof:
And port:
Not having to totally re-core these areas is a real blessing. This saves me weeks of hard work. I do have areas that I know will need to be done but man, I feel lucky.
The decks along the cockpit, the aft deck and the cockpit floor will all need extensive re-coring so my joy will only last until this coming weekend!
Fair winds...._/)
I started on the hole where the old sewage system suction vent passed through the port decks. I knew this area was bad. I started by drilling holes through the top skin and inspecting the core beneath. By doing this I could determine extent of rot and mark it for removal.
I made the cuts using a 4-1/2" Kobalt diamond blade on a grinder. The outer cut is 3-1/2" from the toe rail which leaves a 1/2" lip over the core. The outer or left edge of the hole pictured above is the hull to deck joint.
I wanted to keep the patches square or rectangular in order to keep it simple. I had to sacrifice good solid core to do this though. Some rot and some good solid core:
Not as bad as I thought it would be. I scraped out the old core, cleaned it up and sanded the bottom skin down to a good surface. I also used a dremel to remove the core around the edges about a 1/4".
And then grinded away the surrounding gelcoat and beveled the bonding area.
Cut the new core and cloth...
And made the repair!
My very first re-core! I was threatened by rain the whole time. Once the old core was exposed, the clouds showed up and it was raining all around but not right where I was thank goodness. I was worried about it though, trust me. Eh, I forgot to mention that before making this patch, I filled the edges where I removed old core with thickened epoxy.
From there I moved to the port side genoa track. This is a series of six holes through which the track mounts. It was highly suspect in my mind. I didnt want to muck up the entire area though so I started by inspecting the core at each hole. I used a 1-1/4" carbide grit hole saw and sawed out each hole.
Much to my surprise there was not rot! I sounded out board of these holes and it seemed solid.
So, I cleaned up the holes and removed a 1/4" of surrounding core using these dremel bits:
These things made the job easy...kinda. I could not imagine having to use a bent nail in a drill for this. Here they are ready to fill:
I decided at this point to visit every hole on the fore and side decks in this manner. What a blessing I was faced with when I was done! No rot at any of them! 38 holes and all were bright yellow core as if it were installed yesterday!
I now had 38 1" and 1-1/4" holes to clean up, remove surrounding core, acetone wipe and fill with epoxy. The inner perfectionist in me would not allow a shoddy job so this took some time.
Here is an example of a hole ready for epoxy. It is hard to see but the core is recessed 1/8" all around
Through some experimentation I determined that I needed a pour-able epoxy mixture. The mixture I chose was a one using milled glass rather than cabosil. For each two "pumps" of West Systems epoxy I added one heaping tablespoon full of System 3 milled glass. This made a very strong plug that would not break and could be poured.
Now how to pour it!?!? I have not had very good luck with big syringes so I came up with a good solution that made this easy too. I took a 16oz plastic dixie cup and made a small hole right at it's bottom but on it's side. I could then pour a few ounces of the milled glass epoxy in the cup, return my pot of epoxy to the bucket of cool water and work with the cup. By tipping the cup towards the hole I could control the rate of flow and fill my patch with no mess. Genius!
I filled all 38 holes this way without spilling any which was amazing. I am used to epoxy everywhere! After the filled holes tacked up a bit I had to go back and finish filling them with thickened epoxy because they were all on a slope like this:
You can see the high side (left) where the thickened epoxy is much more opaque.
The fore deck done!
Starboard coach roof:
And port:
Not having to totally re-core these areas is a real blessing. This saves me weeks of hard work. I do have areas that I know will need to be done but man, I feel lucky.
The decks along the cockpit, the aft deck and the cockpit floor will all need extensive re-coring so my joy will only last until this coming weekend!
Fair winds...._/)
Thursday, July 5, 2012
Stuffing Box-Shaft Log Details
Ariel CD 36 asked a few questions in a previous post and I would like to answer in detail. What better way to do that than with pictures!
I was originally planning to re-use the shaft log/bearing housing that was on the boat. But after removing it I noticed that the hole through the deadwood was much larger than the log. This created a situation where there was very little space around the hole, on the sides especially, for bedding material. By my measurements it was 1/8" on the sides. 1/8" of caulk between me and sinking is not enough! You might be able to see it here:
Alberg 30s around the world have floated for years with this situation without trouble. The previous owner did warn me that this joint was leaking and needed attention. After finally getting the old housing and log out I saw an opportunity for improvement. The hole measures 1-3/4" diameter by the way.
Here is the old housing and log, 10-1/4" in total length:
And what it looked like on the inside before removal. It was a very tight fit which made getting to the hose clamps difficult.
Fast forward now to somewhat recently. I decided on replacing the entire assembly with a new FRP log and bronze stuffing box from Spartan Marine Hardware. I had also decided to jump up to a 1" shaft so some of the sizes I will be quoting are not standard.
The tube is 12" G10 FRP, 1-1/2" OD and 1-1/4" ID. Spartan machined the tube, installed the bearing (size BOSS) and secured the bearing with three set screws which are in turn secured with SS wire in a machined groove around the outside.
The bearing
The other end
They also machined a 2" wide area of the outside of the bearing end for me. This is so I would have a good surface for glassing it in. Very nice of them.
The stuffing box that I went with is Spartan part no. B155. It is a notched end 1" shaft and 1-1/2" hose. Perfect match for the log! I say that because stock A30s have always had an issue with this connection. Anyway, here are some closeups of the box:
It does require special wrenches
But they also offer 12 notches rather than the usual 8 sides of a typical hex box.
There is it Ariel CD 36! I know I over did it but thats just me :)
Fair winds...._/)
I was originally planning to re-use the shaft log/bearing housing that was on the boat. But after removing it I noticed that the hole through the deadwood was much larger than the log. This created a situation where there was very little space around the hole, on the sides especially, for bedding material. By my measurements it was 1/8" on the sides. 1/8" of caulk between me and sinking is not enough! You might be able to see it here:
Alberg 30s around the world have floated for years with this situation without trouble. The previous owner did warn me that this joint was leaking and needed attention. After finally getting the old housing and log out I saw an opportunity for improvement. The hole measures 1-3/4" diameter by the way.
Here is the old housing and log, 10-1/4" in total length:
And what it looked like on the inside before removal. It was a very tight fit which made getting to the hose clamps difficult.
Fast forward now to somewhat recently. I decided on replacing the entire assembly with a new FRP log and bronze stuffing box from Spartan Marine Hardware. I had also decided to jump up to a 1" shaft so some of the sizes I will be quoting are not standard.
The tube is 12" G10 FRP, 1-1/2" OD and 1-1/4" ID. Spartan machined the tube, installed the bearing (size BOSS) and secured the bearing with three set screws which are in turn secured with SS wire in a machined groove around the outside.
The bearing
The other end
They also machined a 2" wide area of the outside of the bearing end for me. This is so I would have a good surface for glassing it in. Very nice of them.
The stuffing box that I went with is Spartan part no. B155. It is a notched end 1" shaft and 1-1/2" hose. Perfect match for the log! I say that because stock A30s have always had an issue with this connection. Anyway, here are some closeups of the box:
It does require special wrenches
But they also offer 12 notches rather than the usual 8 sides of a typical hex box.
There is it Ariel CD 36! I know I over did it but thats just me :)
Fair winds...._/)
Tuesday, July 3, 2012
Clean frames at last!
Last Saturday was Africa hot. Sunday was too for that matter. Much too hot to cut and grind in a tyvek suit out in the sun so I decided to tie up some loose ends....in the shade.
First thing was to finish up the scaffolds. I screwed 2"x4"x8's to the bottom of the planks as you can see here.
And I screwed stoppers on the ends. I also thru-bolted the leg to beam connection of the scaffolds.
During this task I helped a neighbor find their missing cat, talked to another newer neighbor about his impending divorce and his hatred of women. After that, another neighbor showed up and we talked like we always do for way too long while her dogs pissed all over my sparkling new scaffolds. Then while I was actually doing the work, I was helped by two little boys aged four and six. They were full of questions and had to be right where the action was! That part was cool and I didn't mind them nearly as much as the adults.
Fortunately before I started the work on the scaffolds, I applied magic goo to four of the remaining eight deadlight frames. So while I was being inundated with conversation, anger and questions, the magic goo was doing it's thang. Believe it or not, applying the goo to the frames is tedious and takes a long time. Why does everything related to boat work take three or four times longer than other types of work? Paying attention to detail is a large part I know but crap! Anyway, the goo had to sit for three hours before I could scrape it off.
Then comes the even more tedious job of scrubbing the frames with soapy water using a #2 3M stripping pad. Four of these also had paint on the outer exposed surface. I guess masking tape was too much trouble for the previous owner.
My scrubbing station:
Looks like an idyllic spot in the shade doesn't it? Right outside my door and therefore within easy reach of beer and aircon when I need a break. Well, as I sit here on Tuesday, I can say that it was a nice little spot...as I scratch the 100 or so chigger bites that cover my body <frown>. At least it was not a tick attack which Kentucky is famous for.
It took about an hour per frame to scrub and at the end of the day I had four done.
Sunday I repeated the apply goo, wait, scrape and scrub process on the remaining four frames. This was mixed with shaving off my beard, grocery shopping, washing clothes and watching the Euro soccer championship. I am not a soccer fan but it will do until football season!
At the end of the day, my reward was 16 silicone and paint free deadlight frames,
Extremely sore hands and a delicious Filipino style Chicken Adobo dinner! If you try it, remove the skin and add a teaspoon of fresh grated ginger for true authentic taste. Quick, easy and oh so good!
I have the next five days off YEAH! I think I will forego the tyvek, because of the heat, and try to set up a fan to keep the itchy dust off of me. I really want to start re-coring. It is a big job and I need to get all of the fiberglass work done and the decks painted by October.
Fair winds..._/)
First thing was to finish up the scaffolds. I screwed 2"x4"x8's to the bottom of the planks as you can see here.
And I screwed stoppers on the ends. I also thru-bolted the leg to beam connection of the scaffolds.
During this task I helped a neighbor find their missing cat, talked to another newer neighbor about his impending divorce and his hatred of women. After that, another neighbor showed up and we talked like we always do for way too long while her dogs pissed all over my sparkling new scaffolds. Then while I was actually doing the work, I was helped by two little boys aged four and six. They were full of questions and had to be right where the action was! That part was cool and I didn't mind them nearly as much as the adults.
Fortunately before I started the work on the scaffolds, I applied magic goo to four of the remaining eight deadlight frames. So while I was being inundated with conversation, anger and questions, the magic goo was doing it's thang. Believe it or not, applying the goo to the frames is tedious and takes a long time. Why does everything related to boat work take three or four times longer than other types of work? Paying attention to detail is a large part I know but crap! Anyway, the goo had to sit for three hours before I could scrape it off.
Then comes the even more tedious job of scrubbing the frames with soapy water using a #2 3M stripping pad. Four of these also had paint on the outer exposed surface. I guess masking tape was too much trouble for the previous owner.
My scrubbing station:
Looks like an idyllic spot in the shade doesn't it? Right outside my door and therefore within easy reach of beer and aircon when I need a break. Well, as I sit here on Tuesday, I can say that it was a nice little spot...as I scratch the 100 or so chigger bites that cover my body <frown>. At least it was not a tick attack which Kentucky is famous for.
It took about an hour per frame to scrub and at the end of the day I had four done.
Sunday I repeated the apply goo, wait, scrape and scrub process on the remaining four frames. This was mixed with shaving off my beard, grocery shopping, washing clothes and watching the Euro soccer championship. I am not a soccer fan but it will do until football season!
At the end of the day, my reward was 16 silicone and paint free deadlight frames,
Extremely sore hands and a delicious Filipino style Chicken Adobo dinner! If you try it, remove the skin and add a teaspoon of fresh grated ginger for true authentic taste. Quick, easy and oh so good!
I have the next five days off YEAH! I think I will forego the tyvek, because of the heat, and try to set up a fan to keep the itchy dust off of me. I really want to start re-coring. It is a big job and I need to get all of the fiberglass work done and the decks painted by October.
Fair winds..._/)
Saturday, June 30, 2012
105° Scaffolds
It was 105° yesterday and I needed something to do that could be done in the shade. So, I built these two scaffolds!
They even stack! They stand 5'8" tall and are kinda heavy but very stout. I am going to thru-bolt the legs to beam joint this morning for a little added security. They will also get a coat of Thompson's Wood Sealer.
I dragged them out of the shade and next to the boat for this shot. 8pm-ish.
I have two PT 2"x8"x10's as planks. I am going to attach a 2"x4"x8' and an end stopper to the bottom of each plank to stiffen them up and keep them from sliding off the scaffolds. Job not quite done but close enough to blog about it and pump my chest!
I tried to do some recore work on the side decks using the ladder and kneeling. That proved way to dangerous so making these was the next logical step.
Forecast is 102° today with rain tonight and tomorrow :(
Fair winds...._/)
Thursday, June 21, 2012
Fore Deck Repairs
I patched the three holes in the fore deck last weekend and I learned a few things too!
1. Grinding the bottom surface, upside down in the bow is hard.
2. Only one tool will properly grind fiberglass when upside down: a grinder.
3. Make measurements and mark the limits of the planned grind beforehand so that the cloth patches can be premade thus saving time and daylight.
4. Mixing epoxy and performing the actual patching in the dark is not the preferred method.
5. Plan ahead. Run to the store to buy supplies at night or prior to starting the work, not during the work.
6. Make cardboard templates to mark and cut common sized, round cloth that will be used over and over.
7. Use fast hardener for tack coats of epoxy if you have it.
8. Learn from mistakes!
OK! I think that anyone who reads the above can imagine how it all went down. The patches are good and solid but it just took a very long time. So, without getting in to a drawn out, embarrassing narrative I will post some pictures in the hope of saving face!
Three holes ground/beveled. Same on the under side. By the way, the core is all good on the fore deck including around these holes. By my toe you can see where the cleats were mounted over the bulkhead below. The core is slightly compressed in that area but not rotten.
Earlier in the week I received this pair of awesome scissors in the mail. What a difference they make when cutting fiberglass cloth. Money well spent.
I used all kinds of things around the house to mark the circular cloth plugs for cutting. Plastic paint pots, an epoxy filler canister, a dixie cup, the bottom piece of a terracotta garlic roaster and this bottle of chimichurri...
Cutting these out took a lot longer than it should have...
because I was day dreaming and taking pictures of trees with my new camera :)
It is at this point that I had to go buy sand to make these sand bags. In Florida sand is white and all one has to do to get it is dig a hole. The sand that I bought is labeled "play sand", is better than the clay one would dig up here in Kentucky and is pinkish! The bags I made are double bagged and are sealed with Gorilla Tape and staples. I am so proud of them!
Running out of light here. I applied a tack coat of epoxy before placing these ...
and this one. I did not use fast hardener which I have. Big mistake!
It got dark waiting for the underside patches to stiffen up enough to set the topside patches. The forecast for the following day was rain so I needed to get it did. But here I sit taking pictures, waiting for the slow hardener to harden slowly. That is my back porch boat yard glowing behind the building center pic.
At this point I put the camera away and gathered everything I needed on the bow to finish this task in the dark. It was after midnight when I was done and everything put away again. The headlight meant for night time ocean sailing really came in handy for this land locked, frenzied, nocturnal epoxy slingin!
I was sore the next morning. Anyone who has done this kind of work knows what is involved, Carrying stuff up, forward, back, down blah blah blah....
The rain passed just north of where I am, lasted all day and caused flooding conditions. I was lucky. Here are the fruits of my labor from the night before:
My beautiful sand bags over the patches...
and the patches themselves!
No dry cloth for a change! Actually I used a little too much epoxy and it seeped around the edges. No problem though, I am going to grind/sand the gelcoat anti-skid pattern off. I could have used a fourth layer of cloth on the two holes right side. They are very solid though.
I had envisioned getting twice or three times the amount of work done over the weekend than I actually did. I will take what did get done and try to plan better so that I am not left waiting or wasting precious time in the future. I have three full days off this weekend but my expectations are to just do a good job, not a fast job.
Fair winds..._/)
Thursday, June 14, 2012
Playing with boogers! Part One
BOOGERS! If you are going to follow my blog, you have to have a strong stomach and the attention span of a terracotta Chinese warrior! My posts are few and sometimes they contain references to things that we all live with but never mention.
Last weekend was not the leap in productivity that I had suggested it would be. Friday was spent goofing off on the interwebs ordering expensive hardware and checking out other peoples boat restoration blogs. Saturday was my birthday. Sunday was a day spent in the shower washing off the shame and regret left over from Saturday. In other words, I took the weekend off from boat work!
Feeling totally guilty, I hit it hard beginning Monday by trying to clean the deadlight frames. Through some experimentation I found that relying solely on the Magic Goo to remove the silicone was not the way to go. Blindly spreading the goo on a frame makes a huge mess but it also does something else more insidious. Where the silicone is thin, the goo makes the silicone very hard to remove. Where the silicone is thick, the goo renders it so soft that it can be scraped with an epoxy stirrer. Very strange behavior.
So, after two frames of this, I resorted to "rolling" the thin silicone off with my thumbs and leaving the thick, tough silicone for the goo. Rolling industrial silicone boogers off of aluminum boat window frames on which they have been adhered for forty plus years is hard work. After repeating this procedure on the remaining six small frames, over the next few days, I can claim the toughest thumb calluses and strongest grip ever earned in such a short time! Cred goes out to "hot soapy water" and "3M pads"! Without them I could not have done it!
Check it out. Eight clean small frames!
Now the BIG frames! I am ready. Bigger silicone boogers = bigger rewards!
If you read this far, I commend you. Hopefully you will not have to endure any more sophomoric blog posts until you read "Playing with boogers! Part Two"!
This weekend: The deck repairs I promised myself last weekend.
Subscribe to:
Posts (Atom)


