Check it

My photo
Florida flat-lander refitting an Alberg 30, hull #329, for an eventual circumnavigation of the globe and the journey of a lifetime before I get too old!

Saturday, March 30, 2013

Fore Hatch Construction

It has been quite a while since I have bloggity blog blogged! Well, let me limber up my fingers and get right to it. I am about to take you on a ride into the seedy underworld of solid epoxy experimentation and fiberglassing fantasy land! You will never be the same after reading this....because it is going to be a long read!

Ok. So my original forty five year old fore hatch was leaking and being held together by the lens screws. The lens was a clear one or at least twenty five years ago it was clear. It needed to be replaced.

See, its old and crappy.


Disgusting. But I am sure it was gorgeous back in the day.


The wood has lost a lot of meat.


Because I am a lazy bastard who doesnt want to be a slave to constantly varnishing, I decided to do something different, something I have never done before; I am going to make my own glass hatch!

BANG!


BANG! For the shape I striped 3/16" G10, carefully cut to length. I held them away from the hull with 3/16" chair leg pads. That is not the real name for the pads but I have been drinking...felt lamp pads whatever. They are there to allow room between the hatch and deck for gaskets on the sides.


I glassed these together, in place, to form the beginnings of the best fore hatch in the history of Kentucky! This is the fragile result:


Another view...


And another with thickened epoxy curing in the corners to give it some stability.


Next up was to make something to epoxy my new frame to that would also be a seat for the new smoked lens. I was actually making all this stuff in a different sequence but I do not want to confuse you. So for the sake of the story I am simplifying it....or dumbing it down :)

Anyway, here is the makings of what I call "the lens seat".

I traced the new lens and then drew inner parallel lines. That is 1/4"x24"x24" G10 by the way...


Then I cut the exterior portions off. I used a 2x4 clamped in place as a guide and a tungsten grit blade in the jigsaw.


Then using a tungsten grit hole saw, I started the interior cuts. I bought a complete set of grit hole saws 3/4" up to 4". Cost is no concern for my baby! (but i have to say OUCH!)
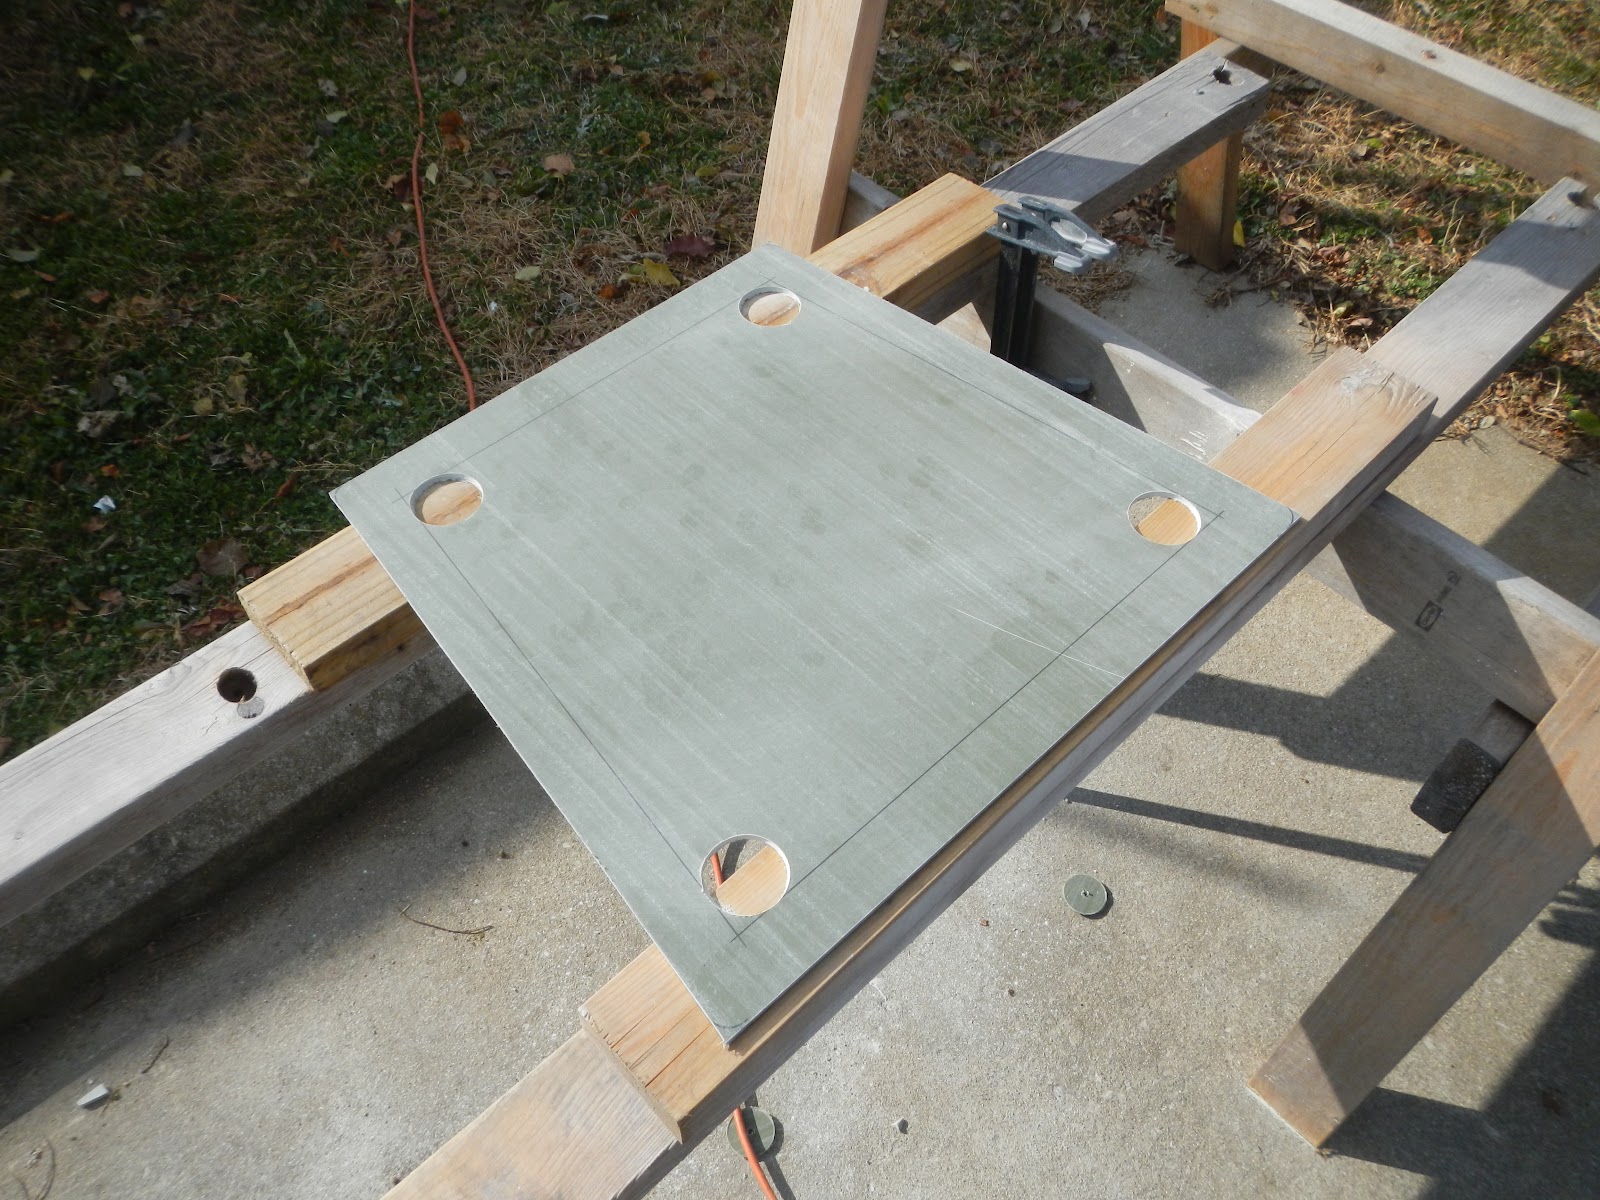


After cutting from hole to hole, this is the result! I rounded the corners after this pic...


After playing around with the pieces I have so far I realize there is a design flaw...


I knew this was coming but I didnt know exactly how much was needed. You can see the gap there, its 3/8". So I set about stripping four pieces of 3/8" G10 and cut/trimmed to fit to beef up the lens seat piece. They are slightly smaller, or inset, so that there is room for filler later.

First two epoxied in place...


And the next two pieces overnight...who snuck the bud light cartons in my house?!?!?!?


With that done I could tack the other piece on. It was getting cold so I used 207 hardener. Trying to keep the neighbor's dog from pissing on it was a challenge.


I then applied a couple rounds of thickened epoxy on the inner part and used a heat lamp to help it along because it was getting cold outside. 50's...brrrrrrr


Over the next couple of weeks I filled the exterior portions, sanded, filled sanded, filled some more and sanded some more...except for the aft side. That was going to take some special attention due to it needing to be....different!

Check it out so far...


and...


and...


the G10 cutting/ripping station....


Next was addressing the aft side. I need it to be solid, well more solid than the rest because it will be drilled through and bear the weight of the hatch on hinges.

So what I did was carefully rip this piece of G10 to fit and then epoxy in place. I didnt get a picture of the rip but it is a sharp angle on top that allows it to fit inside where it looks ill fitting in this pic:


I then epoxied in place and filled the gaps on either side...


It turned out alright, up to this point anyway....


Lens in place...test fit


I did not take pictures of the fairing out part of the work. Here is a pic of it faired out and ready for painting.


I need to drill holes for the lens and the hinges yet but it is 90% complete structurally. See that thing behind it? That is the new companionway hatch which I made simultaneously along with the fore hatch.

I had to stop construction (and the refit) here (mid Jan) because something big has happened. It is good news and I will tell you my secret after I fully update the blog!

Fair winds...._/)

Thursday, September 27, 2012

Still kickin!

Yes, still kickin but what a bad streak of health issues I have had. Nothing life threatening thank goodness. I did however get the flu six weeks ago to the date, strained my back twice and caught the "Kentucky Crud". At my lowest point during this period I was literally crawling on all fours while drowning in my own fluids. It has been awful.

I am now, as of a few days ago 90% again. Thanks to a very good chiropractor, my back issues are behind me as long as I exercise, stretch properly and mind how I sit and stand. My spine was a mess and my back  muscles were in full revolt! The "Kentucky Crud" is perpetual chest congestion and everyone I know has it. Meetings at work are a cacophony of sickly coughs and hacks that have become the norm. I can not wait to get back to Florida or some other warm place!

Now that you are up-to-date with the minute details of my biological and physiological well being....

I did some boat related work this past weekend! WOO HOO! I built two temporary hatch covers, one for the bow hatch and another for the lazarette. Three coats of paint later and they are protecting the interior of the boat like champs!


They fit perfectly which made me happy. I needed something to go right!

I took the rather beat up teak hatches off so that I could give them new life over the winter. I bought the materials to do so, including a new lens for the bow hatch. With all of the idle time I have had lately, my mind has wandered to taking it a step further and fabricating new ones. Mind wandering is really an understatement because what I have in mind is building a mold and making the hatches out of FRP rather than teak. Teak would be too easy! I will update on this later but I am actively studying the art of making molds and all of that kinda fiberglass science.

Not boat related but still worthy of reporting: I bought a small gas grill and converted it to a lava rock grill of our childhoods. The kind that dad used to burn dinner on but the food still tasted awesome. You remember. Long story made short with pictures!


The last pic is after curing the grill on high with some wet, green oak wood in it for a couple of hours. It cooks like a wood burning grill and does not burn or dry food out like a modern gas grill. I have been using it for a few weeks now and everything cooked on it has been perfect. I am very proud of this baby!

Keeping with this theme: I have lost 19 pounds since my last post nearly six weeks ago! Fried everything is a thing of the past. My new diet during the week; no beer, eat like a King for breakfast, like a Prince for lunch and like a pauper for dinner. My weekend diet is the same; beer beer beer until Sunday evening when I finish off with something extravagant like a deliciously rare steak and veggies. Hey, its working!

Fair winds...._/)

Thursday, August 23, 2012

More deck patching

First post in three weeks! Writer's block.....

It rained all weekend three weekends ago so nothing to write about then. The following weekend I was hobbled by a strained muscle in my back. I did patch the holes in the port side cockpit deck that weekend but I also re-injured the muscle while doing so.

This past weekend I made some real progress. My blinker is on and I am about to turn a corner in the project!

The rainy weekend was disappointing but my new toy helped wile away the hours. A boat sized bass.


I managed to strain my back by simply stepping out of the shower. It always seems to happen in such a mundane way. Even when I re injured it, it was not during my heroic attempt at boat work while crippled. It happened again that evening while rolling over in bed after I made these port side patches;


Healthy again and no rain for three days a week later allowed me to get'er did. The Grind.


The backed bottom patches pulled up snug with mono strung through the centers and wrapped around the sticks. The 2x4s are there to keep them from falling over and unwinding.


I let those harden so they would not sag but still slightly tacky. Then I patched them.


I let those tack up then painted with neat epoxy, let that tack then faired.


The dead soldiers


It is amazing how long it takes to do this shit. Ninety percent of the time involved is preparation. The other 10 percent is equally divided between actually doing the work and drinking beer.

I left a lot out for speeds sake. I have to be leaving for work five minutes ago!

Fair winds...._/)