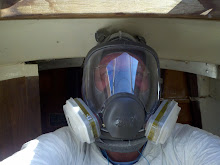
Last post October 16? Really? It has been cold, that is my excuse.
Back in November, right before the weather changed I actually did some work on the boat. I had removed the two winches and all of the other hardware from the cabin top. I then reamed, beveled and filled all of the fastener holes with thickened epoxy. I took a ton of pictures documenting my superb craftsmanship and planned to post all of this information to the blog but the SD card in my phone (camera) died before I could get them downloaded. So, you readers will have to take my word for it.
This past Christmas day, I took a few hours to measure (survey!) for a new piece of kit that I intend on installing. The Cape Horn Windvane is a state of the art mechanism that will steer the mighty Cookie when at sea allowing me to enjoy the ride. No serious ocean voyager goes to sea without some sort of self steering unless they are just masochistic. A sailor can not sit at the tiller 24/7 and it is the windvane that allows for time to sleep, cook and fart around below. Most sailors love their windvane so much that they even give them names. Mine might be Milk. Cookie and Milk, get it? Give me some ideas guys!
Being a surveyor I took the measuring (surveying!) for my windvane very seriously. The first thing I had to do was to level the boat. I did this by placing a long carpenter's bubble level on the cabin sole and cranking the trailer tongue up or down until level. I climbed up, down, in and out of the boat several times to get it just right. Do not worry though, three beers later I had it perfect! I double checked it on the outside by using a clear hose filled with water to verify the bottom of the keel matched the sole which it did.
I next had to remove the mainsheet traveler and taffrail both of which were in the way of my measuring (surveying!). The taffrail is in pretty bad shape and came off easily after removing a few remaining bungs and 10 screws. The mainsheet traveler was another story. It was difficult to remove due to the fact that I only have two hands. I managed to remove the ten paint encrusted bolts that I could only feel and not see after much cursing and some bruising caused by leaning down into the hatch to reach them. I discovered some structural damage when I removed the traveler which will need to be repaired. The backing block has been pulled up during violent gybes apparently. This has caused some deck damage at the ends of the traveler.
Pic of the mainsheet traveler and the taffrail which is falling apart:
I was pleasantly surprised to find that the tops of the lazarette hatch edges are parallel with the cabin sole! This seemingly simple fact makes this measuring (surveying!) exercise much easier. I can lay my measuring stick down on those edges and go to town!
First I measured out where the vane will mount in the cockpit; Centered and 9" up from the cockpit floor. I then drilled a very small hole and inserted a string:
I then lined up the end of the measuring (surveying!) stick so that it was perfectly vertical above where the vane will enter the cockpit. As it turns out this bulkhead is not true vertically, it leans aft about a 1/4" as you can see here. I used a level to get it right:
I then attached the string inside the lazarette to the chainplate knee making sure it is also level:
Now I am ready to measure (survey!) I made a mark on the string at 18" from the fore end of the measuring stick (my survey baseline!) using a plumb bob. From that mark and the string I could measure everything I needed inside the lazarette. I then moved the plumb bob outside to the aft end of the measuring stick so that I could measure (survey!) the stern and water line.
Plumb bob at 18" to mark the string:
The aft end of the baseline. I had already removed the plumb bob but never fear, I did it right with a level and everything, even to the water line!
Using the baseline and my measurements from inside, I marked where the vane will exit the transom, although it is really hard to see in this picture. I went back later and used a permanent marker;
And my survey field notes:
I then input the measurements in Autocad and produced a drawing annotated in metric units for the Canadian manufacturer:
I sent the above drawing to Yves, the owner of Cape Horn Windvanes and ordered mine! I am pretty proud of the job I did since I know how accurate it is.
Next on my plate will be to mock up a fuel tank using cardboard so that I can get that ordered and in place before I put the new engine in this spring.
Happy New Year!


