Check it

My photo
Florida flat-lander refitting an Alberg 30, hull #329, for an eventual circumnavigation of the globe and the journey of a lifetime before I get too old!

Tuesday, July 31, 2012

Starboard cockpit decks

A little more good news. No rot encountered on the starboard side cockpit deck! This was an area that I thought was going to be ate up because of all of the holes. Upon further inspection it appears that each was sealed with silicone. I had not noticed this when I was taking everything off. The fuel fill holes were a little discolored where the silicone had wore away but the balsa seems fine.

I am going to patch the fuel fill holes later along with some others. Grinding them out would have made a mess and delayed filling the hardware holes. Here is the deck, hardware holes sawed out to 1" and 1-1/4", dremeled for recess and cleaned up ready for expoxy. I drilled out some of of my test bores too but not all. 


And filled with epoxy mixed with milled fiberglass and later leveled with thickened epoxy.


Small update, I know. I played golf on Saturday and I still feel guilty three days later!

Fair winds...._/)

Tuesday, July 24, 2012

Baby steps

Little by little....very little. That is the speed at which things are progressing. Oh well.

I worked on the decks on Saturday. The genoa track holes and the chainplate holes on the starboard side were patched.

I want to show how I kept water out of the chainplate holes. After I removed the plates, I placed some butyl tape over the holes and them covered them with packing tape.


These held up for six months and they never leaked. Cleaning these off prior to patching was a little messy but it worked as intended. The tape had to be scraped off and then the area had to be cleaned with mineral spirits.

Here is the genoa track holes after being drilled out, the core dremeled back and cleaned up with acetone.


And the chainplate holes. I dremeled them clean which also made them bigger but there is a good surface in them.


I used the same epoxy-milled glass mixture as before and poured all of the holes full. Once tacked up, I went back and leveled them with thickened epoxy.


I also went around the cabin top and filled some holes that I had ready like these.


That is all I did on the boat itself over the past few days. I did some other stuff though!

The fore hatch captured my attention....mainly because I could work on it in the shade! I needed to send off the lens to have a new one cut to fit so I took it apart.


Guess what? The lens is what was holding the frame together! I was afraid of that. It didnt come apart totally but it was rather loose at all joints. The wood is good but the forty eight year old screws are shot. To save it, I am going to cut four pieces of 1/8" x 1-1/2" leg bronze L bar in 1-1/2" lengths and screw them to the corners. So, my frame will have 1-1/2" bronze corners! With the new lens screwed on and these new bronze fittings, the hatch should be pretty strong. If it doesnt work, I am going to use the old frame to make a mold so that I can make my own frame out of FRP.

Here is how I secured the frame so that I could carry it upstairs to its very own space out of the way! Seems like overkill doesnt it? I didnt want to take the chance of it folding over and breaking the joints at the screws. The clamps are just snug enough to carry it.


And I made some "corks" for lining up and recording the shaft alignment using the old shaft log.


The little cork is for the old shaft log and the bigger one is for the hole in the deadwood. I will reinstall the old log, run a string through the cork, install it as pictured above and then run the string through the boat to a board clamped in the door at the forward bulkhead. I will then line the string up perfectly at the center of the old log and mark the string position on the board in the door. The board needs to be marked where it meets the bulkhead too. This will give me the alignment of the old engine and shaft which I will need when I build new engine beds for the new Beta 16 that sits in my dining room.

And now it is time for a rant! Why do retailers put stickers that do not come off easily all over there wares? Look at this:


That box is wrapped in a nice plastic covering. That sticker is stuck to the surface of the box, not the wrapping!


GRRRRRRRRR! I had six or seven things around the house that had these torn stickers thoughtlessly stuck to them besides the two new boxes. So I gathered them all up and cleaned the obnoxious stickers off of them all with mineral spirits. Is it just me or is stickers on the product and not the wrapping stupid?

I let it bother me for exactly one beer and then I was fine!

Fair winds...._/)

Friday, July 20, 2012

Rain is a pisser!

SEE!


It has rained for days and days. Never once during all that time did I think to check the boat because I knew the little 5/16" hole I drilled a year ago was on the job. Last Sunday, when I was inspecting the rudder gudgeons, I noticed moisture where it did not belong and decided to poke the above mentioned hole. When I did, a stream like you see in the pic, shot out and was actually almost horizontal. The stream of water was shooting out over the frame for a minute or two. It startled me but I was able to gather myself and capture the pic like a hero.

I only mention this because I forgot about it when I was writing the last post. I have not forgot about it since though. It has been a wet week again and I have checked it every day because I can not sleep knowing there is water in bilge!

I really need to install this very nice 1" ID bronze garboard drain that I have had for some time and even bought fancy, schmancy tools for. This job is now the No. 1 priority once dry air returns.


Fast forward now to today, Friday! My Saturday! There needs to be another name for Friday if one has three day weekends. Lazyday! Screw-it-till-Saturday Day! Procrastinateday!

I woke up at 5am so that I could beat the heat, humidity and the forecast which called for...rain...again. My main objective is recoring so any chance of rain rules that out.

Plan B  was to secure and tighten the tarp covering the open windows/deadlights/saloon which has been blowing around wildly all week in the shitty weather. I got that done by 5:30am, wearing only my Dolphins underwear! (really? yes. it was dark still)

Plan C (coffee and FaceBook) was executed afterwards, flawlessly and for too long. It is funny to me how the more coffee that I drink, the more I think about the "other things" I need to do. Well, it finally sank in and I got busy.

I need a high quality, carbide (preferably) or diamond grit, 10" saw blade with a 5/8" bore, designed for cutting fiberglass. I set about trying to find one online and soon found that you have to know people to get that shit. Four hours later I had lunch but I also found what I was looking for thanks to Minaret from Cruisers Forum.

With that score I could move on to doing other things, like check the mail and make a beer run. Hey, its gonna rain!

Mail was good. It brought me deadlight lens blanks, 3/16", 50% grey Lexan:


17 courtesy flags:


these treasures: (original Alberg 30 stanchion bases)


This wonderful USB stick filled with the complete discography of "All India Radio", a band from Australia. If you like ambient, soft music Google/YouTube them. My ears are smiling :)


AND 2 bottles of Datu Puti sugarcane vinegar. If you want to cook authentic SE Asia dishes that call for vinegar, you must have this brand and type. There is no substitute. I lined up the others for the pic but they are second rate. Behind them though...Maltose for sweet asian bbq....Rose wine for everything!


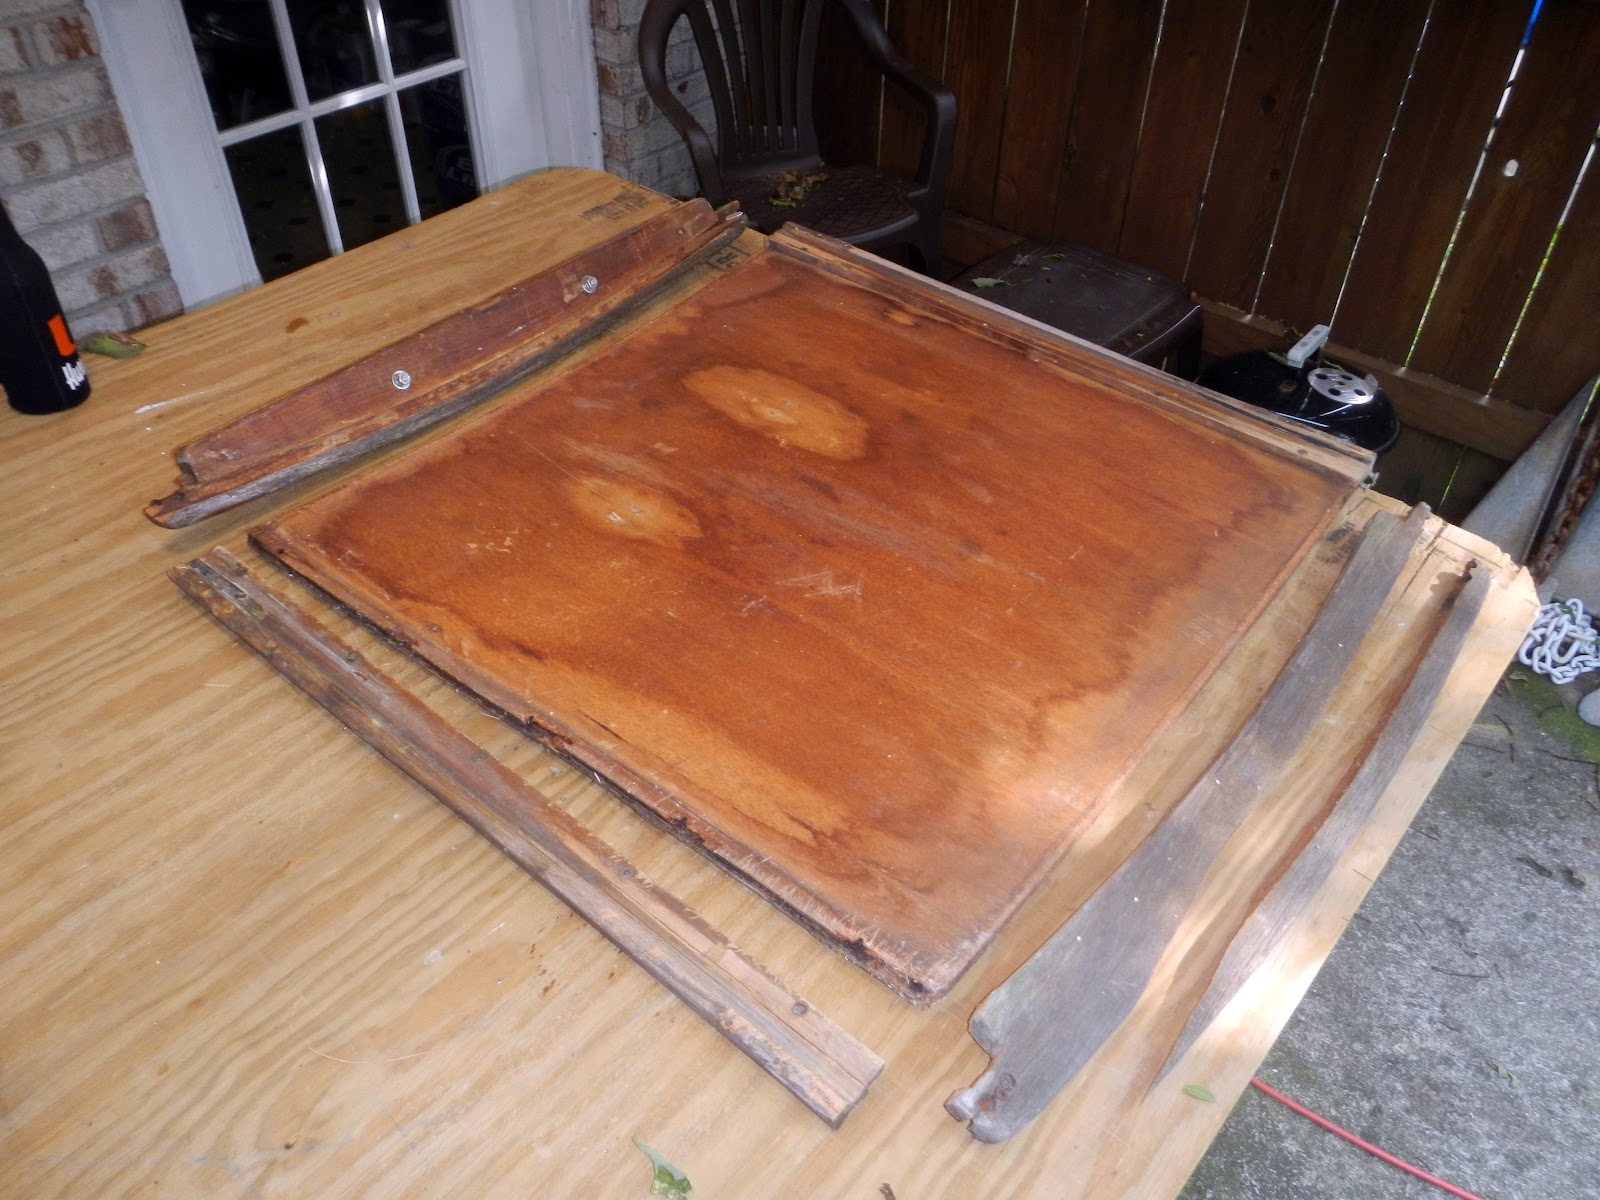
I did do some boat related stuff. I need to build a new companionway hatch to replace the one that was blown off the boat and exploded in to exactly six pieces last fall. To that end, I gathered the pieces and arranged them for this picture!


Actually, I was going to reassemble/glue it all back together so I can better understand and make a clone. Then it rained.....the rain that was forecast all day....for 10 minutes.

It was the 10 minutes of oh so sweet rain that I needed because I had an epiphany during it's song. The melody of the rain reminded me of the measurements that I made of the hatch while I was in Annapolis. Measurements made and recorded before it met the winds of Kentucky that not even Indians would dwell in:


Thank the spirit wolf/bear/goose or skunk I made those measurements then because if I had not, I would be lost like the fair skinned, red headed tribe that haunts the land that I work on. (ask me)

Wooo, shit was getting deep. Out of my trance now, back to reality!

I measured a few things that I missed the first time, did some magic and came up with some fractiods:


With this info in mind, I ordered the material I need to build a new companionway hatch and sea hood! I know, I said I was going to do it last week.

I also futzed around with ideas on how to save the fore hatch:


More on that later because I have to get up in five hours. No rain in the forecast but hot. Early bird gets the worm....

Ignore the typos...and the prose....and the dramatic. I have been drinking!

Fair winds...._/)

Monday, July 16, 2012

Rainy weekend to-do list

FRIDAY MORNING 7/13: I am making the following list of stuff that I need to do over the upcoming three days of rain. Lets see if I can do it!

MONDAY MORNING 7/16: Comments in green!

° Old generator - clean carbs/tank, tune up and sell.
FAIL! I decided to forego cleaning the carbs and spending any money on this thing. I took some pics, placed an ad in Craigslist and waited....and waited....and waited. Two guys emailed me, even though my phone number was in the ad, and offered trades. I am trying to get rid of stuff, not exchange stuff.


° Clean old caulk off of Goiot 30 hatch frame.
WIN! This was much easier than the window frames. Before:


After:


° Remove Goiot 30 teak hatch base from cabin top.
FAIL! I did not step in the boat once over the whole weekend.

° Sort my shorts. Yes, really!
WIN! This amounted to reorganizing the spare bedroom (the sail loft) and the closet in that room. This room has two six foot long folding tables sitting side by side in the middle of the room. The walls are lined with stacks of old stuff I have taken out of the boat along one wall and new and as yet not installed stuff along another wall and under the tables. It is now uncluttered again and I will be able to put even more stuff in there YAY!

° Sew buttons back on shorts that need it. Move others!
FAIL! I just simply was not feeling the sewing bug. Besides, beer and needles could be dangerous!

° Move charts upstairs and sort/catalog.
WIN kinda! I bought a nearly complete set of British Admiralty charts of the world that came off of a recently wrecked freighter. The set does not include very many small scale (ports) charts but the important ones are there. The set is made up of mostly large scale charts that cover the globe, 100 pounds worth. Here is a pic of the boxes they arrived in:


And here I have moved them to the sail loft upstairs and sorted in numerical order. I want to go through them and catalog them so I can see what I have and what I need to complete the set.


° Fix ID lanyard.
WIN! Low hanging fruit, fixed with gorilla glue.

° Remove old epoxy from paint pots, clean up stirrers and spreaders.
WIN! Cleaned up while I had my morning coffee in the boat yard (back porch) while it rained.

° Re-install shaft log and permanently mark alignment inside boat.
FAIL! Didnt get in the boat.

° Remove winches from winch pedestals. Inspect winches.
WIN! But it was not easy! On the port side, larger Barient 22 winch, two bolts did not cooperate. I had to force their submission by drilling the heads off and punching them through. No damage was done to the winch or the pedastal because I was careful although frustrated. Check it out:


BANG!


And BANG again!


Check this out, one of the older winches was being held on by one bolt. The rest had backed off. None of them had lock washers.


° Poke around/inspect the rudder shoe and gudgeons.
Eh, I took some pics, so WIN!


° Plan companionway hatch and sea hood. Make a material list, place order.
FAIL! I am doing it today though! I am going to make these out of G10 laminate and possibly Coosa board.

° Measure deadlight lens and forward hatch lens. Make a material list, place order.
WIN! Ordered five 12"x24"x3/16" smoke tinted lexan sheets.

° Measure for and order Bomar inspection hatch for cockpit floor.
WIN! I ordered the nice aluminum version.

I had a great weekend even if it did rain off and on the whole time.

Fair winds...._/)


Tuesday, July 10, 2012

Recore and a blessing!

Last week I had some spare time and I intended to use it by beginning my re-coring project. There were some spots that I knew needed re-cored and others I was not sure about. Every hole was suspect and there were a lot of holes.

I started on the hole where the old sewage system suction vent passed through the port decks. I knew this area was bad. I started by drilling holes through the top skin and inspecting the core beneath. By doing this I could determine extent of rot and mark it for removal.


I made the cuts using a 4-1/2" Kobalt diamond blade on a grinder. The outer cut is 3-1/2" from the toe rail which leaves a 1/2" lip over the core. The outer or left edge of the hole pictured above is the hull to deck joint.

I wanted to keep the patches square or rectangular in order to keep it simple. I had to sacrifice good solid core to do this though. Some rot and some good solid core:


Not as bad as I thought it would be. I scraped out the old core, cleaned it up and sanded the bottom skin down to a good surface. I also used a dremel to remove the core around the edges about a 1/4".


And then grinded away the surrounding gelcoat and beveled the bonding area.


Cut the new core and cloth...


And made the repair!


My very first re-core! I was threatened by rain the whole time. Once the old core was exposed, the clouds showed up and it was raining all around but not right where I was thank goodness. I was worried about it though, trust me. Eh, I forgot to mention that before making this patch, I filled the edges where I removed old core with thickened epoxy.

From there I moved to the port side genoa track. This is a series of six holes through which the track mounts. It was highly suspect in my mind. I didnt want to muck up the entire area though so I started by inspecting the core at each hole. I used a 1-1/4" carbide grit hole saw and sawed out each hole.


Much to my surprise there was not rot! I sounded out board of these holes and it seemed solid.

So, I cleaned up the holes and removed a 1/4" of surrounding core using these dremel bits:


These things made the job easy...kinda. I could not imagine having to use a bent nail in a drill for this. Here they are ready to fill:


I decided at this point to visit every hole on the fore and side decks in this manner. What a blessing I was faced with when I was done! No rot at any of them! 38 holes and all were bright yellow core as if it were installed yesterday!

I now had 38 1" and 1-1/4" holes to clean up, remove surrounding core, acetone wipe and fill with epoxy. The inner perfectionist in me would not allow a shoddy job so this took some time.

Here is an example of a hole ready for epoxy. It is hard to see but the core is recessed 1/8" all around


Through some experimentation I determined that I needed a pour-able epoxy mixture. The mixture I chose was a one using milled glass rather than cabosil. For each two "pumps" of West Systems epoxy I added one heaping tablespoon full of System 3 milled glass. This made a very strong plug that would not break and could be poured.


Now how to pour it!?!? I have not had very good luck with big syringes so I came up with a good solution that made this easy too. I took a 16oz plastic dixie cup and made a small hole right at it's bottom but on it's side. I could then pour a few ounces of the milled glass epoxy in the cup, return my pot of epoxy to the bucket of cool water and work with the cup. By tipping the cup towards the hole I could control the rate of flow and fill my patch with no mess. Genius!

I filled all 38 holes this way without spilling any which was amazing. I am used to epoxy everywhere! After the filled holes tacked up a bit I had to go back and finish filling them with thickened epoxy because they were all on a slope like this:


You can see the high side (left) where the thickened epoxy is much more opaque.

The fore deck done!


Starboard coach roof:


And port:


Not having to totally re-core these areas is a real blessing. This saves me weeks of hard work. I do have areas that I know will need to be done but man, I feel lucky.

The decks along the cockpit, the aft deck and the cockpit floor will all need extensive re-coring so my joy will only last until this coming weekend!

Fair winds...._/)