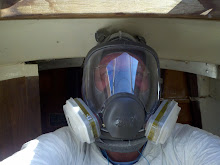
Ahhh the lovely weather we had here in Kentucky this past weekend! Considering how nice it really was, I should have got done a lot more than I did. Getting totally hammered Friday night didnt help. Hey, all work and no play makes Jimmy a dull boy! Now that I got that out of my system and finally over the flu I look forward to some serious progress in the coming weeks. I work four days and off three so I am out of excuses!
Friday I wanted to determine what the configuration of the engine mount beds were going to look like. I already knew from removing the old motor that it was going to be a tight vertical fit at the aft mounts. So, in order to confirm and take measurements, I built a template of the new motor mounts for the Beta16. Here it is:
The 2x's on the sides were striped down to 3 inches which puts the bottom sides at the mean of the vertical range of the mounts. They are also marked on the sides with the centerlines of the mounts and cut to length of the beds giving 2 inches to each end from the farthest mounting bolt. The 2x4 sticking out of the end with the supports simulates the face of the motor side coupler. I was going to cobble a notch thingie that I would mount on that 2x4 that would then slip over the coupler on the shaft and would support the whole template. Before doing that I decided to take it to the boat and perform a rough check before going through all that trouble. I am glad I did because when I held it in place on the shaft coupler there was 1/4" of "mount" between my template and the hull on the aft ends. The forward ends were fine. This means I am going to have to have special mounts fabricated. No problem but I need to decide how much vertical relief I am going to need. I set everything aside and called the Beta dealer to make sure that mounts that rise up 2 or 3 inches will not interfere with anything on the motor. He assured me that there was nothing to worry about. After much thinking I have decided to wait until I have the motor in my possession before going any further and possibly screwing up. After all, I might have to move the motor forward.
On Saturday I was pretty hung over but I did make an effort. I started by trying to remove the prop shaft. I wrongly thought that I could simply polish the scale off of the outboard end, oil it up and pull it through the tube from the inside. WRONG! After a lot of wasted energy I figured out it was not going to happen like that. The stuffing box was fused together solid so I had to go for the weakest link...the housing hose. The forward hose clamp was new and easy to loosen. The aft clamp was old, probably original and buried in a semi-solid goo. Not in a mood for being gentle, I cut this old clamp with a dremel. After making the cut I straightened up and kinda lost my balance. To catch myself I instinctively grabbed the prop shaft. Well now that it was basically unattached that was the wrong thing to do! Me and the prop shaft both went tumbling into the saloon backwards. Luckily I still have my front teeth! Here is the proof of the prop shaft removal. The old housing hose. This HAD to be original which makes it 43 years old.
And the prop shaft
And the shaft log
On Sunday I started by removing the old gas tank. There is talk on the A30 list of a group buy of Moeller tanks. In that discussion one gentleman mentioned that ten years ago he installed ten or twelve metal tanks that sat on the shelf in cockpit locker of those boats. Well, I think my boat was one of those that he installed the tanks in. This tank looks identical and was mounted the same way that the group is discussing. Here it is already unmounted:
And out
It is in good shape (I think) so I might keep it for kerosene. Since five gallons of kerosene will probably last me a year, an eighteen gallon tank might be too much though.
I finished the day by removing all exterior gear that had bolts extending in to the saloon/galley. Things like cabin top winches, turning blocks, fairleads and dodger snaps. Most of the nuts came off without a second person (Ha!) outside with a screw driver despite the thick paint on the bolts. For the stubborn ones I rigged up a telescoping shower curtain rod as a stop for small vise grips on the nuts. I then climbed out and turned the bolts with a screw driver until I heard the vise grips fall off with the nut in tow. I did maybe 15 like this. No pictures of this ingenious operation.
I also removed the instruments from the aft cabin trunk. These were not sealed in any way! No gaskets, 4200, 5200...NOTHING! Not even the dreaded silicone which seems to be on everything else! What is even more amazing is that the core around the holes appears to be pristine! I dont get it. See for your self...
Three big vertical cored holes. On these I will cut my glass work teeth on. Piece of cake! lol
Oh, and I attempted (ATTEMPTED) to countersink some of the bolt holes. I found out that non-carbide countersink bits will not even countersink one hole in fiberglass, much to my chagrin. With this discovery I called it quits for the weekend.


No comments:
Post a Comment