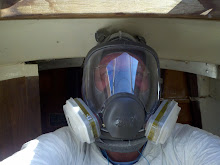
1. Grinding the bottom surface, upside down in the bow is hard.
2. Only one tool will properly grind fiberglass when upside down: a grinder.
3. Make measurements and mark the limits of the planned grind beforehand so that the cloth patches can be premade thus saving time and daylight.
4. Mixing epoxy and performing the actual patching in the dark is not the preferred method.
5. Plan ahead. Run to the store to buy supplies at night or prior to starting the work, not during the work.
6. Make cardboard templates to mark and cut common sized, round cloth that will be used over and over.
7. Use fast hardener for tack coats of epoxy if you have it.
8. Learn from mistakes!
OK! I think that anyone who reads the above can imagine how it all went down. The patches are good and solid but it just took a very long time. So, without getting in to a drawn out, embarrassing narrative I will post some pictures in the hope of saving face!
Three holes ground/beveled. Same on the under side. By the way, the core is all good on the fore deck including around these holes. By my toe you can see where the cleats were mounted over the bulkhead below. The core is slightly compressed in that area but not rotten.
Earlier in the week I received this pair of awesome scissors in the mail. What a difference they make when cutting fiberglass cloth. Money well spent.
I used all kinds of things around the house to mark the circular cloth plugs for cutting. Plastic paint pots, an epoxy filler canister, a dixie cup, the bottom piece of a terracotta garlic roaster and this bottle of chimichurri...
Cutting these out took a lot longer than it should have...
because I was day dreaming and taking pictures of trees with my new camera :)
It is at this point that I had to go buy sand to make these sand bags. In Florida sand is white and all one has to do to get it is dig a hole. The sand that I bought is labeled "play sand", is better than the clay one would dig up here in Kentucky and is pinkish! The bags I made are double bagged and are sealed with Gorilla Tape and staples. I am so proud of them!
Running out of light here. I applied a tack coat of epoxy before placing these ...
and this one. I did not use fast hardener which I have. Big mistake!
It got dark waiting for the underside patches to stiffen up enough to set the topside patches. The forecast for the following day was rain so I needed to get it did. But here I sit taking pictures, waiting for the slow hardener to harden slowly. That is my back porch boat yard glowing behind the building center pic.
At this point I put the camera away and gathered everything I needed on the bow to finish this task in the dark. It was after midnight when I was done and everything put away again. The headlight meant for night time ocean sailing really came in handy for this land locked, frenzied, nocturnal epoxy slingin!
I was sore the next morning. Anyone who has done this kind of work knows what is involved, Carrying stuff up, forward, back, down blah blah blah....
The rain passed just north of where I am, lasted all day and caused flooding conditions. I was lucky. Here are the fruits of my labor from the night before:
My beautiful sand bags over the patches...
and the patches themselves!
No dry cloth for a change! Actually I used a little too much epoxy and it seeped around the edges. No problem though, I am going to grind/sand the gelcoat anti-skid pattern off. I could have used a fourth layer of cloth on the two holes right side. They are very solid though.
I had envisioned getting twice or three times the amount of work done over the weekend than I actually did. I will take what did get done and try to plan better so that I am not left waiting or wasting precious time in the future. I have three full days off this weekend but my expectations are to just do a good job, not a fast job.
Fair winds..._/)


It's great to read about your progress. I'm hoping it'll inspire me to get back to work on my A30 (not that I don't have enough other stuff going on, but...). Keep it up.
ReplyDeleteThanks for stopping by and saying hello! Other people's restoration blogs, including yours, are great sources of information and inspiration for me. My utmost inspiration is the picture that I have, in my minds eye, of Cookie being complete and sailing the high seas with me at the helm!
ReplyDeleteWe do this so that we can sail. If I were you I would be sailing my CD rather than slaving away on a project too!